

Open Loop vs Closed Loop: What Print & Packaging Professionals Need to Know
In this article we’ll walk you through open loop vs closed loop:
- What “open loop” and “closed loop” control really mean in a print environment
- The key advantages and disadvantages of open loop vs closed loop
- How a closed‐loop system is built and why it pays off
- Guidance for when your shop should move from open loop toward closed loop (and how to do that).
What is “Open Loop” and “Closed Loop” in Print Color Control?
Defining the Terms
Let’s begin by defining the two approaches in plain terms:
- Open loop (or “open loop control” / “open loop color process control”): In this configuration, a measurement system is in place (for example a scanner or spectrophotometer measures the printed sheet) and the data is gathered, but the corrective actions are not automatically implemented by the press control system. The operator reviews the data, then manually adjusts ink keys or other press controls in response. In an open loop, the data flow is interrupted.
- Closed loop (or “closed loop control” / “closed‐loop color process control”): In this scenario, the measurement system feeds directly into the press control system (ink zones, console, etc.). The workflow becomes a continuous “control circuit” whereby the system calculates corrective commands and sends them to the press either automatically or with minimal operator intervention. In essence, the color control loop is closed and ongoing.
In short: open loop = measure → operator adjust; closed loop = measure → system adjust (or operator confirm).
Why open loop versus closed loop matters in print
Why is this difference so meaningful? Because the capability to continuously monitor, adjust in real time, and automatically correct makes a big difference in pressroom waste, time to color, consistency shift-to-shift, press stability, and brand compliance.
Open Loop vs Closed Loop: Key Comparison for Print Pros
Here’s a side-by-side comparison of the two models to help pressroom managers, plant engineers, and color specialists evaluate where they stand.
| Feature | Open Loop | Closed Loop |
| Data flow | Interrupted: measurements made, then operator acts manually | Continuous: measurement → software → ink/press control adjustment |
| Operator intervention | High – operator must adjust ink keys | Low to medium – system executes adjustments; operator can override
|
| Make-ready | Slower – manual steps, sample pulling, stops & starts | Faster – automated corrections reduce make-ready time and fewer manual stops |
| Waste / off-color sheets | Higher risk: manual reaction times allow more rejects, mis-runs | Lower risk: faster response keeps color on-target throughout run |
| Consistency across shifts/presses | More variable: depends on operator skill, timing | More consistent: system handles adjustments uniformly |
| Skill dependency | Higher – relies on experienced press operators to interpret and act | Lower – automation reduces dependency on “tribal” knowledge of operators |
| Investment & implementation complexity | Lower cost, faster deployment | Higher cost/complexity but higher ROI over time |
| Best suited for | Lower-volume runs, less critical color tolerances, budget conscious | High-volume, color critical jobs, packaging, where waste and consistency are major concerns |
Why many printers begin with open loop
Many print shops start with open loop because it offers significant gains in color monitoring and data capture, without the full cost or disruption of a closed loop rollout. For example, a solution might use automated scanning + software that gives ink-key suggestions, but the operator still hits the keys manually. That’s a strong step up from purely manual control.
Techkon describes this path via its ExPresso software in “open loop” mode: Use it with Techkon ExPresso software for a cost-efficient and easy to set up and utilize open loop pressroom QC solution for offset.
Why closed loop is increasingly the standard
As brand owners demand tighter print tolerances, as substrate variability (especially in packaging) increases, and as labor skills become scarcer, closed loop control becomes a strategic asset. The benefits go beyond color: reduced downtime, shorter make-ready, fewer press stops, less sheet waste, more consistent output, better customer satisfaction—and ultimately healthier margins.
In fact, adding a closed-loop color control system is often the best and most effective way to breathe new life into an older offset press. The result is automation which decreases job make-ready times … and increases the color consistency across individual press runs, over time, and even across multiple presses or different shifts of press operators.
How a Closed Loop System Works – The Workflow Explained
For packaging and print professionals who want to understand the nuts & bolts of how a closed loop system functions (and why it delivers so much value), here’s a breakdown of the key components and workflow.
1. File conversion (pre-press stage)
The closed loop process often begins in pre-press: alongside the high-resolution plate‐making file, a lower-resolution version (CIP3/CIP4 or 1-bit TIFF) is generated for the closed-loop system. This file is converted via a “hot folder” process into a format usable by the press-side PC. The conversion merges image data with press-specific metadata (ink keys, sheet size, etc.).
2. Ink pre-setting
Once the job is ready, the system uses a “DPI” (Direct Press Interface) or other connection to communicate with the press console. The software (e.g., Techkon PressLink) gathers input on substrate, job parameters and targets (Lab values, density, G7) and calculates initial ink key and sweep positions. The operator confirms at the console and the press is pre-set to start very close to target.
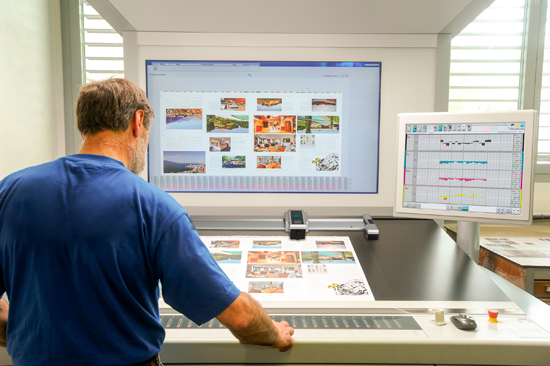
3. Scanning / measurement
Once sheets begin printing, the scanner (for example the Techkon SpectroDrive) pulls a sheet, scans automatically across the ink zones, and returns measurement data including density, TVI, delta E, dot gain, gray balance, etc. This data is fed into the system software. (In open loop mode the operator would then act; in closed loop the system moves to step 4).
4. Automated closed-loop adjustment
Here’s where the “loop” is closed: The software takes the scan data, compares actual vs target, calculates precisely what ink keys to open or close (and by how much), and sends those commands back to the press console. Depending on configuration, this can happen automatically (press changes ink keys without further operator action) or manually (operator reviews and confirms).
5. Optimization / continuous improvement
After a few jobs, the system is capable of learning the press characteristics over time, by evaluating ink-preset data, initial scans, final ink key positions, and optimizing the profile so that future jobs converge faster (Initial efficiency might, for example, start at ~70% on the first run, then ~90% on subsequent jobs once optimized). Over time, the system adapts to press drift, substrate changes, ink curves, etc.
Why each step matters
- The pre-press and ink pre-setting reduce make-ready time and get you closer to target before printing begins.
- Scanning / measurement provides accurate real-time feedback rather than relying on sample sheets & operator estimation or guesswork.
- Automated adjustments ensure faster correction, fewer mis-runs, less waste and less reliance on operator skill.
- Optimization ensures continuous improvement and real ROI—reducing waste, reducing stops, and improving consistency.
The Business Case: Why “Open Loop vs Closed Loop” Isn’t Just a Technical Debate
From a pressroom manager or packaging OEM perspective, comparing open loop vs closed loop isn’t just academic—it’s about time, waste, consistency, profit, and customer satisfaction. Here’s how:
Make-ready time & job turnaround
When every minute of press time costs money (ink, substrate, labor, overhead), reducing make-ready becomes a competitive advantage. Closed-loop systems deliver faster color convergence than manual or open loop approaches.
Waste reduction
Blank sheets, sheets run off‐color, bonus sheets, re-runs—all add up. Manual systems are costing printers worldwide millions of dollars in wasted material, lost productivity and profits. Closed-loop control minimizes those costs.
Staffing and skill dependencies
Skilled press operators are a declining resource in many plants. When you rely on manual correction, or even open loop where operators interpret data and act, you’re more exposed to variability and labor constraints. Closed loop automates more of the decision chain and standardizes output shift-to-shift and operator-to-operator.
Brand compliance & consistency
For print shops serving major brands, packaging applications or long‐run commercial offset, consistency is non-negotiable. Closed-loop color control ensures targets like density, dot gain, grey balance, or G7 alignment are maintained automatically—not just at set intervals. That helps deliver on brand promises and reduce client rejections.
ROI and underlying value
While closed-loop systems require higher upfront investment versus open loop (or manual), the value returns via reduced downtime, fewer mistakes, faster press starts, and elevated color quality. For many printers, that means improved margins and fewer lost jobs from quality failures.